


1. Deploy a WAR File on a Linux
Introduction: Deploy a WAR File on a LinuxAre you looking to seamlessly deploy a war file on a Linux server using Tomcat? Understanding the process of deploying a WAR (Web Application Archive) file is essential for any developer or system administrator. In this comprehensive guide, we’ll walk you through each step of deploying a WAR file on a Linux server running Tomcat, simplifying what might seem like a complex process. |
What You Will Learn:
|
Prerequisites: For Deploy a WAR File on a Linux
|
Putty
Putty is a versatile software primarily used for remote access to systems via various network protocols, such as SSH, and Telnet.
WinSCP (Windows Secure Copy): –
It is a popular open-source SFTP, SCP, and FTP client for Windows. It allows users to transfer files between a local and remote computer securely.
Install This requirement on the Linux server:
Step 1: How to install JDK in the Linux server.
First, check whether JDK is installed or not
Command :- java –version
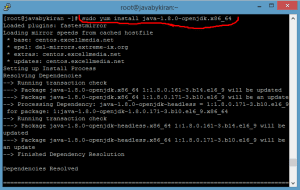
If JDK is not installed on the Linux server then install it.
Command :- sudo yum install java-1.8.0-openjdk.x86_64
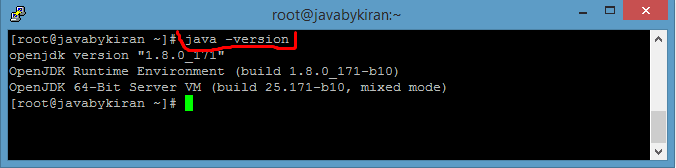
After successfully installing JDK, now check the JDK version and its path.
Command: -java -version (for version)
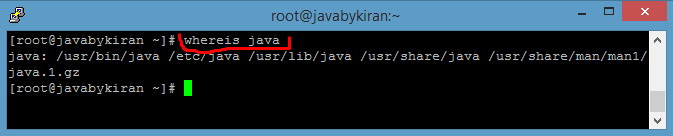
Command: whereis java ( for installation path)
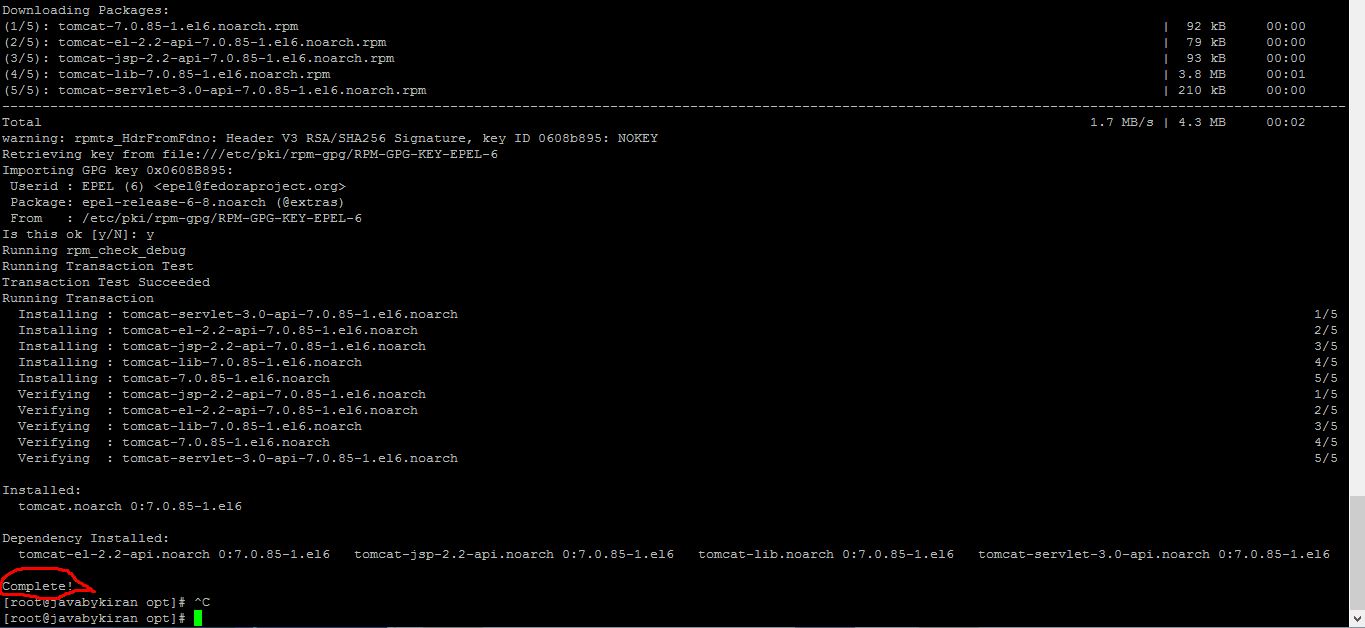
Step 2: How to install Apache Tomcat on a Linux server
- First, check whether Tomcat is installed or not
Command:- tomcat or whereis tomcat
If Tomcat is not installed in the Linux server then install it using the following command
Command:- sudo yum install tomcat
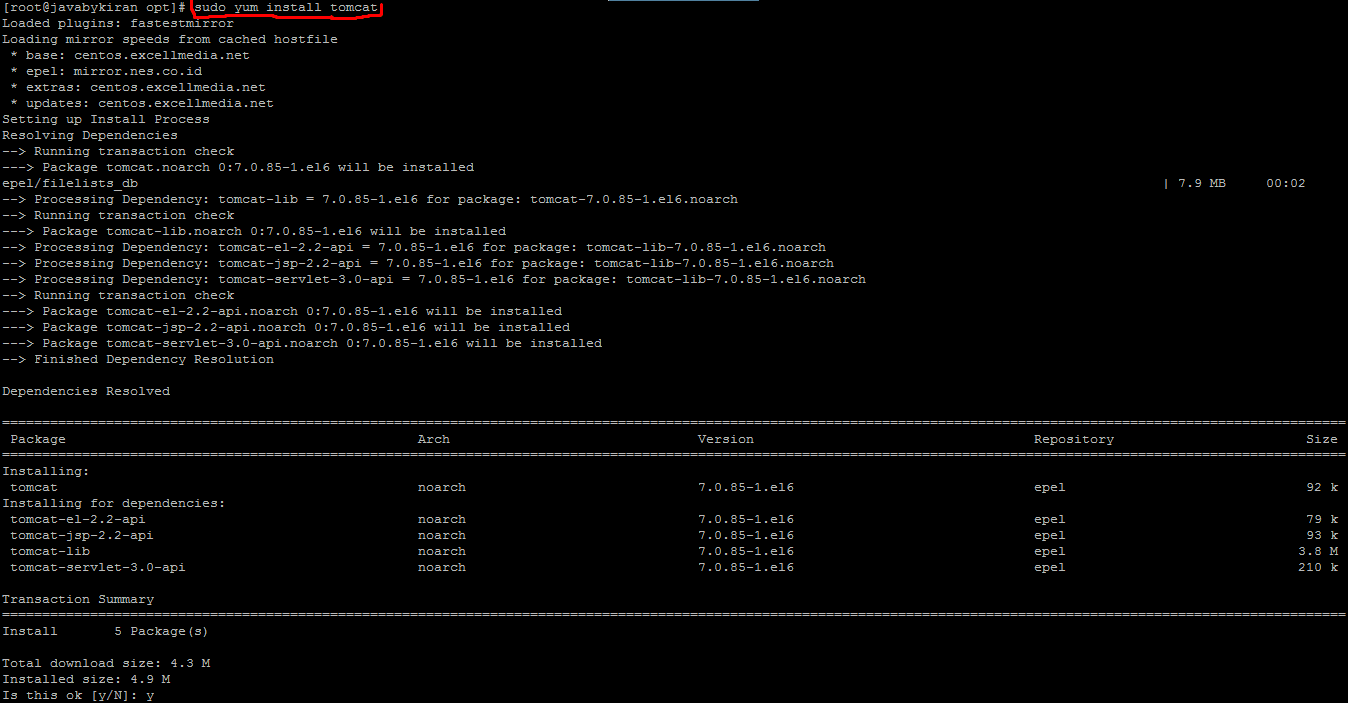
Press Y to continue.
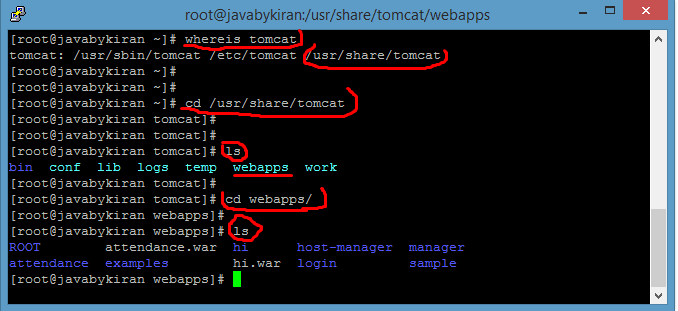
To locate the Tomcat directory and the web apps folder after a successful installation
- To find the Tomcat directory, use the command ‘whereis‘ tomcat’ in your terminal.
- Navigate to the Tomcat directory using ‘cd /usr/share/tomcat‘.
- List the contents of the directory with ‘ls’.
- List the contents of the ‘web apps’ folder using ‘ls’ to view the deployed web applications.”
Command:- whereis tomcat

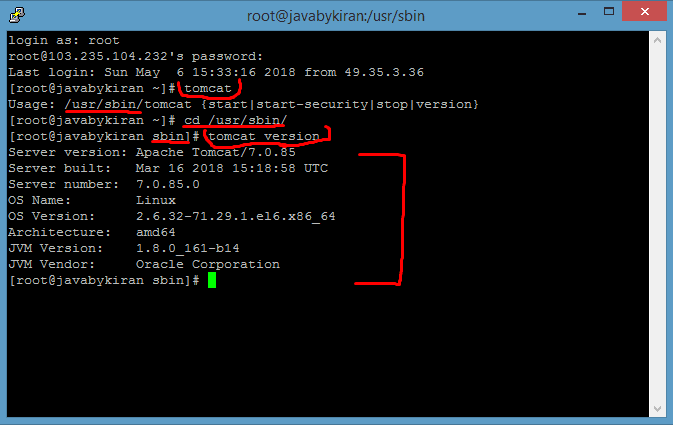
After successfully installing Tomcat, you can check the Tomcat version by following these steps:
- Hit Command: tomcat
- Navigate to the Tomcat directory: Command: cd /usr/sbin/
- Check the Tomcat version using the command: tomcat version
Step 3: How to Install MySQL Server on a Linux System
MySQL is a widely used open-source relational database management system. Installing it on a Linux server involves a few straightforward steps. Here’s a step-by-step guide:
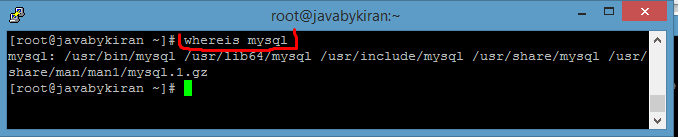
1. Checking if MySQL is Already Installed
Before proceeding with the installation, it’s a good idea to check if MySQL is already installed on your system. You can use the whereis command to do this:
Command :- whereis mysql
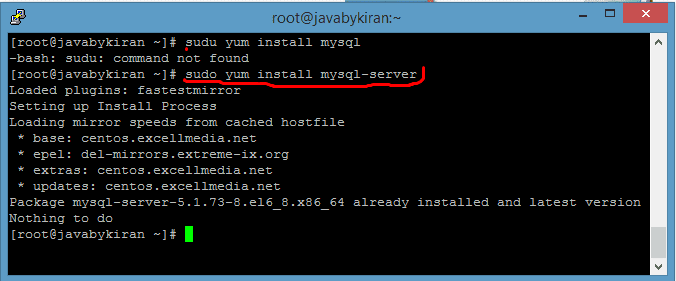
2. If Not Then Install MySQL Server on a Linux System
If the MySQL server isn’t already installed on your Linux server, you can proceed by using the appropriate package manager command for your system.
Command:- sudo yum install mysql-server
After a successful installation, it’s crucial to immediately change the MySQL server’s root password for enhanced security. This can be accomplished using the following command:
3. Stopping the MySQL Server: Distribution-Specific Commands
Command:- service mysqld stop
4. Restarting the MySQL Server with the –skip-grant-tables Option
Command:- mysqld_safe –skip-grant-tables
5. Log into MySQL using the following command:
Command:- mysql
6. Resetting the MySQL Server Password
Command:-
- UPDATE mysql.user SET Password=PASSWORD(‘NEW-PASSWORD’) WHERE User=’root’;
- FLUSH PRIVILEGES;
- exit;
7. Stopping the MySQL Server and Prompting for a New Root Password
Command:- mysql admin -u root -p shutdown
8. Starting the MySQL Server: Distribution-Specific Commands
Command:- service mysqld start
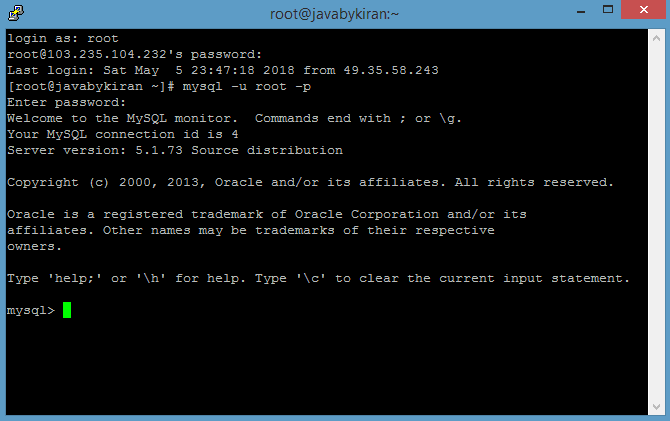
9. Logging into MySQL Server with the Updated Password
Command:- mysql -u root -p
Enter your new password _
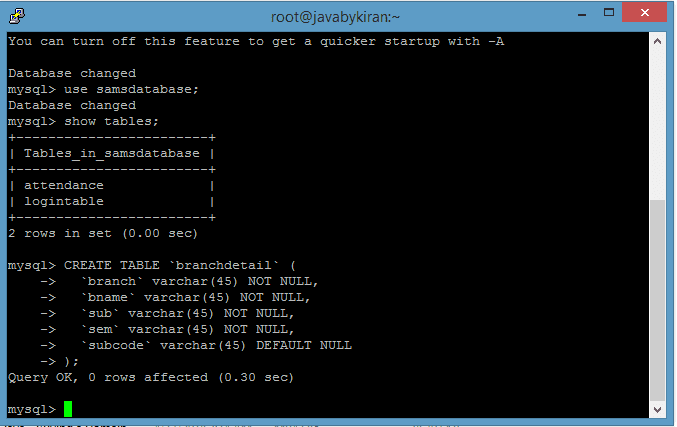
10. Creating Schemas and Tables in MySQL
After logging into the MySQL server with the updated password, you can create new schemas and tables for organizing your data.
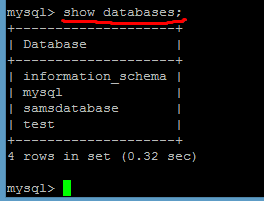
11. To check existing databases (schemas), use the following command:
Command: show databases;
12. To create a new database (schema), you can use the following command:

13. Now create Table
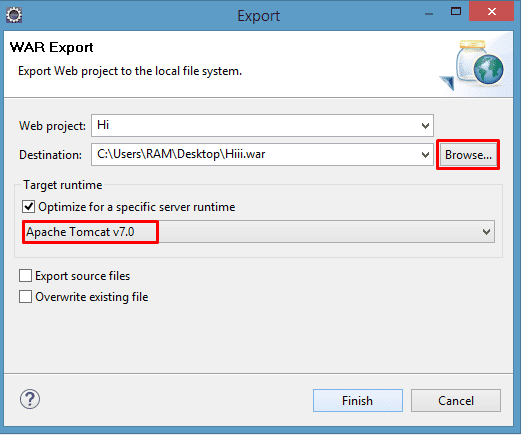
Step 4: How to Create War File of Web Application
- Open your project in Eclipse or your preferred IDE.
- Right-click on the project.
- Choose “Export” > “WAR file”.
- Select the project and destination.
- Click “Finish” to export as a WAR file.
Step 5: Deploying A WAR File On A Linux Apache Tomcat
- Using the Manager App (webapp):
- Access the Tomcat Manager App by navigating to
http://localhost:8080/manager/html. - Log in with appropriate credentials (configured in
tomcat-users.xml). - Use the Manager App’s interface to the WAR file by uploading it from your local machine.
- Access the Tomcat Manager App by navigating to
- Using WinSCP Software:
- Use WinSCP to securely transfer the WAR file from your local machine to the server where Tomcat is hosted.
- Access the Tomcat server directory (
webapps) via WinSCP. - Copy and paste the WAR file into the
webappsdirectory of Tomcat.
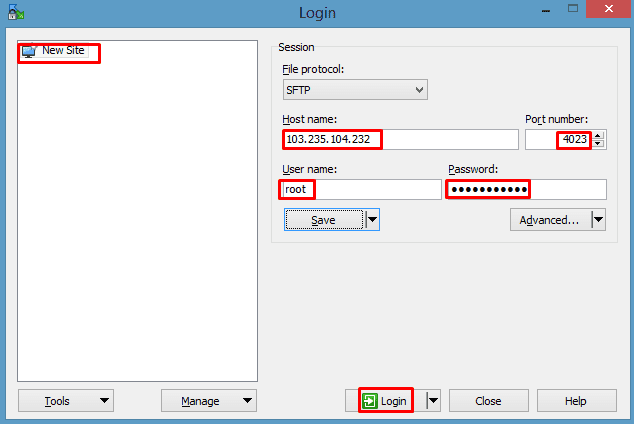 When you successfully log in, a new window will open, displaying…
 Navigate to the webapps folder in the Linux system:
 /usr/share/tomcat/webapps/“
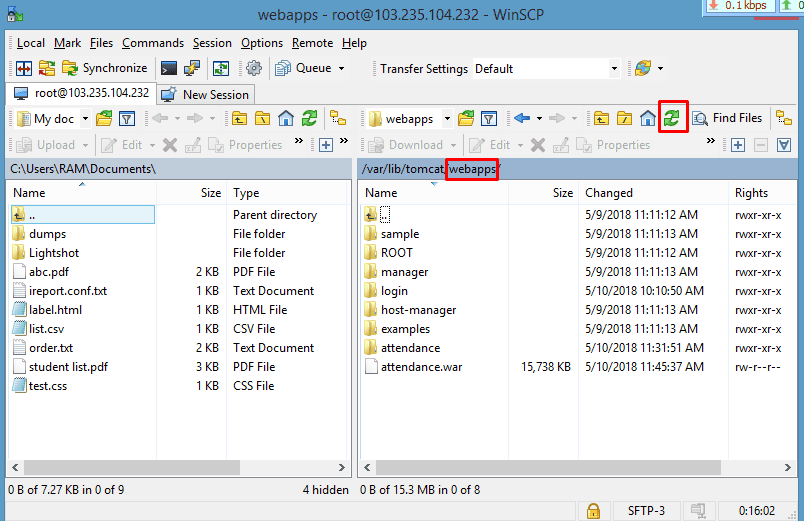
“Now, simply drag and drop the WAR file from your local system to the ‘webapps‘ folder in the Linux system. Afterward, either restart the Tomcat service or refresh it for the changes to take effect.”
At our Java by Kiran Academy, based in Pune, we offer wide range of IT courses, including Java, python course in pune, .NET, testing classes in pune, MEAN, MERN, and more. Enroll now for the flexibility of attending classes either offline or online.


